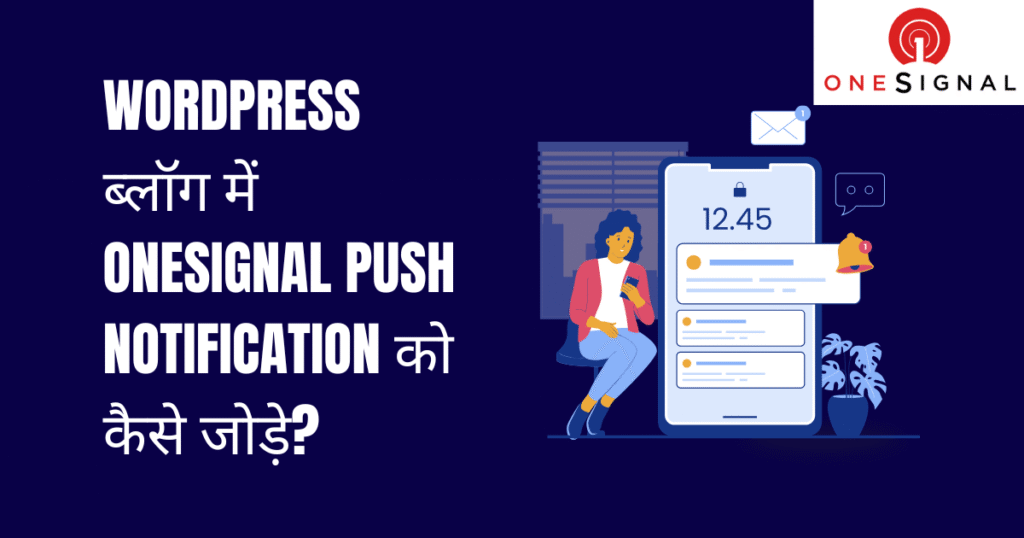
आज की digital दुनिया में Website Traffic और Audience Engagement बढ़ाना हर Blogger, Digital Marketer और Online Business Owner का dream होता है। लेकिन सवाल ये है कि लोग आपकी site पर बार-बार कैसे आएं? 🤔
👉 इसका सबसे best solution है – Push Notifications.
और जब Push Notification की बात होती है तो OneSignal सबसे popular और powerful tool माना जाता है।
इस article में हम detail में जानेंगे:
- OneSignal kya hai?
- What is OneSignal Push Notification in Hindi?
- OneSignal कैसे काम करता है?
- WordPress Website में OneSignal Setup कैसे करें?
- OneSignal के फायदे और नुकसान
- Push Notification क्यों जरूरी है Blogging और Business के लिए?
- FAQs
तो चलिए शुरू करते हैं step-by-step guide 👇
OneSignal क्या है? (What is OneSignal in Hindi)
OneSignal एक Free + Premium Push Notification Service है जो Website owners और App developers को अपनी audience के साथ direct communication करने की power देती है।
🔹 आसान शब्दों में, OneSignal की मदद से आप visitors को real-time में notification भेज सकते हैं, ठीक वैसे ही जैसे mobile apps पर आता है।
👉 Example:
मान लीजिए आपने अपनी WordPress Blog पर एक नया article publish किया। अब आप चाहते हैं कि आपके regular readers तुरंत उसे पढ़ें। तो आप OneSignal से एक Push Notification भेजेंगे – “New Blog Post: How to Rank on Google Fast 🚀” और instantly traffic बढ़ जाएगा।
Push Notification क्या है?
Push Notification एक छोटी सी clickable message होती है जो users के Desktop Browser, Mobile Browser या Mobile Apps पर दिखाई देती है।
🔹 Example:
- जब YouTube पर कोई नया वीडियो आता है और आपको “New Video Uploaded” का notification मिलता है।
- WhatsApp या Facebook Messenger पर “Message Notification” आता है।
👉 Blogging और Websites के लिए यही काम OneSignal Push Notifications करती है।
OneSignal कैसे काम करता है? (How OneSignal Works)
OneSignal का working process simple है 👇
- User Consent (Permission):
जब कोई visitor आपकी site पर आता है, तो उसे एक popup दिखाई देता है – “Do you want to allow notifications?”
अगर वो Allow करता है ✅ तो वह आपके notification subscriber बन जाता है। - Admin Dashboard से Notification भेजना:
अब आप OneSignal Dashboard से customized notification बना सकते हैं। - Real-Time Delivery:
आपका notification instantly उन सभी users तक पहुँच जाता है जिन्होंने Allow किया है।
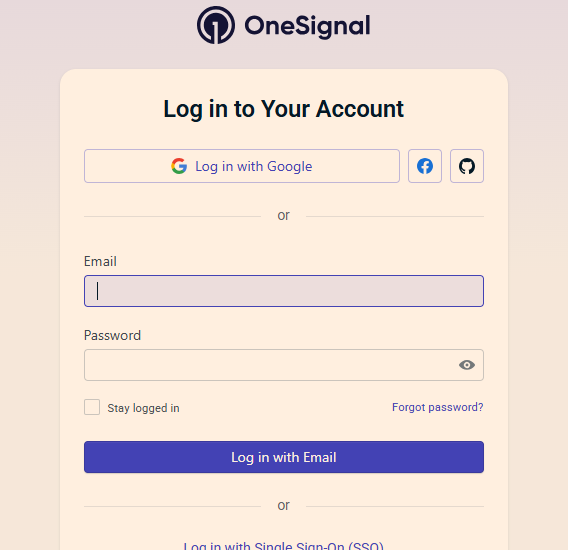
OneSignal में Login कैसे करें?
- Official Website पर जाएं
- सबसे पहले अपने browser में https://onesignal.com open करें।
- Login बटन पर क्लिक करें
- Website के top-right corner में आपको “Log In” का option मिलेगा, उस पर क्लिक करें।
- Login Method Choose करें
OneSignal login के लिए आपके पास अलग-अलग options होते हैं:- Email और Password से Login
- Google Account से Login (One-click login option)
- GitHub / Facebook से Login (optional, अगर आपने पहले sign up किया था)
- Email और Password डालें
- अगर आपने पहले से OneSignal पर account बनाया है तो अपनी email ID और password डालकर login करें।
- Dashboard Access करें
- Login करने के बाद आपको OneSignal Dashboard मिल जाएगा।
- यहाँ से आप नया App / Website project create कर सकते हैं और push notifications setup कर सकते हैं।
⚠️ Important Points:
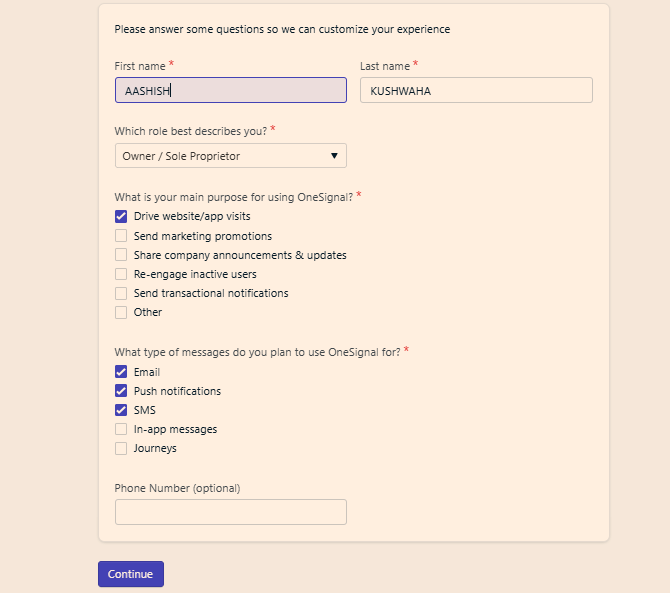
- अगर आप पहली बार login कर रहे हैं और आपके पास account नहीं है, तो पहले आपको Sign Up करना होगा।
- OneSignal free plan भी देता है, जिससे आप basic push notification features use कर सकते हैं।
WordPress Website में OneSignal Push Notification कैसे जोड़े?
अगर आपकी WordPress Blog या Website है, तो OneSignal को setup करना बहुत आसान है।
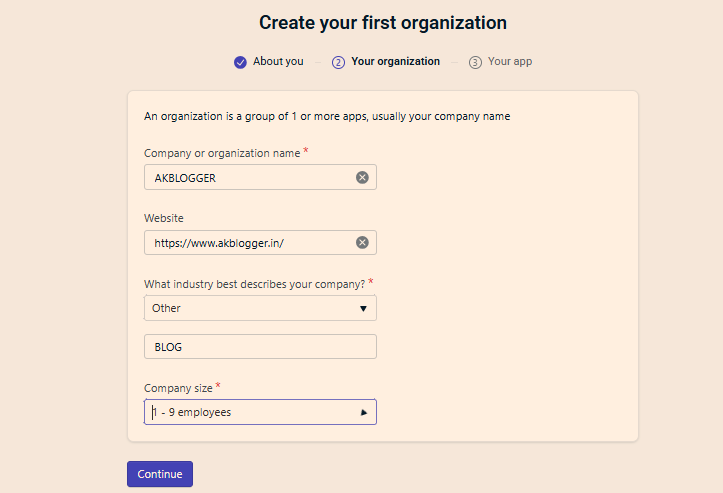
🔹 Step 1: OneSignal Account बनाना
- OneSignal.com पर जाएं
- Free account create करें (Google / Email से login कर सकते हैं)
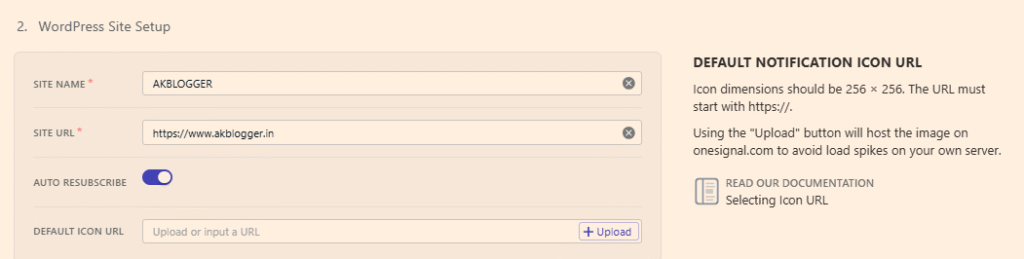
🔹 Step 2: Website Add करना
- Dashboard में “Add App” पर click करें
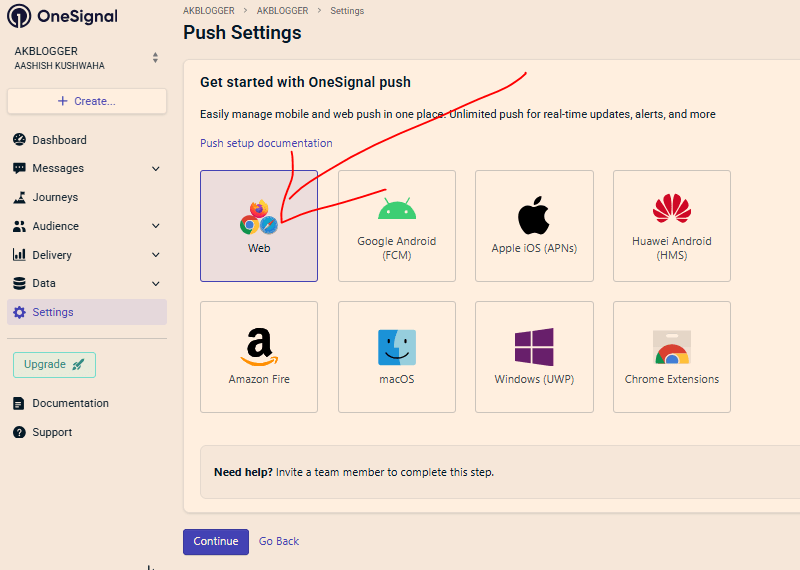
- Website का नाम, URL और Platform (Web Push) select करें
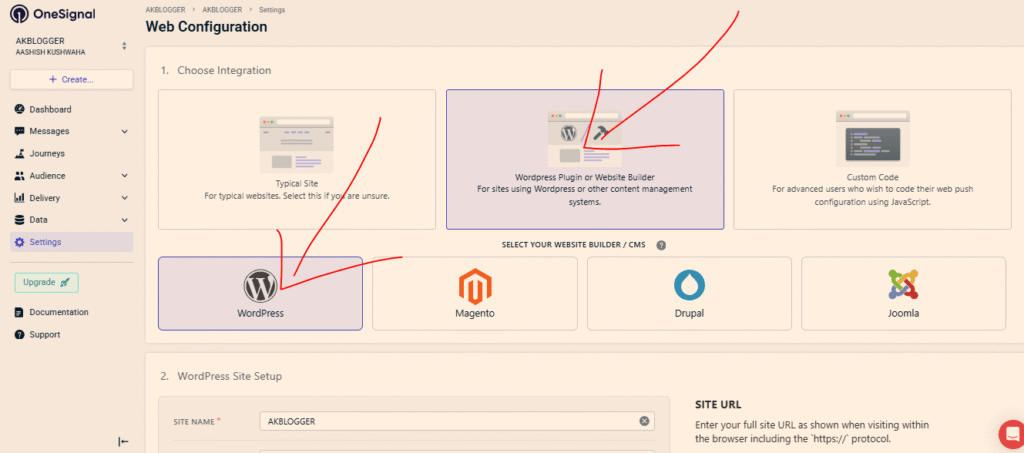
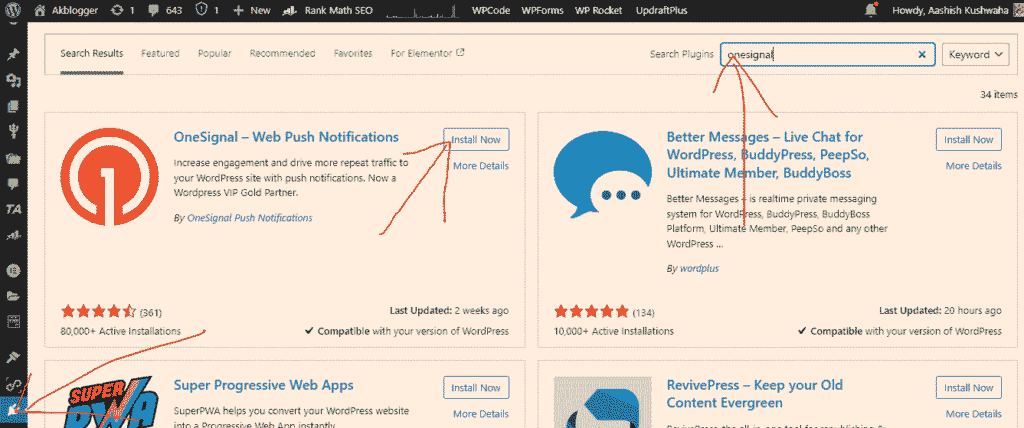
🔹 Step 3: WordPress Plugin Install करना
- WordPress Dashboard → Plugins → Add New
- Search करें OneSignal Push Notifications
- Install + Activate करें
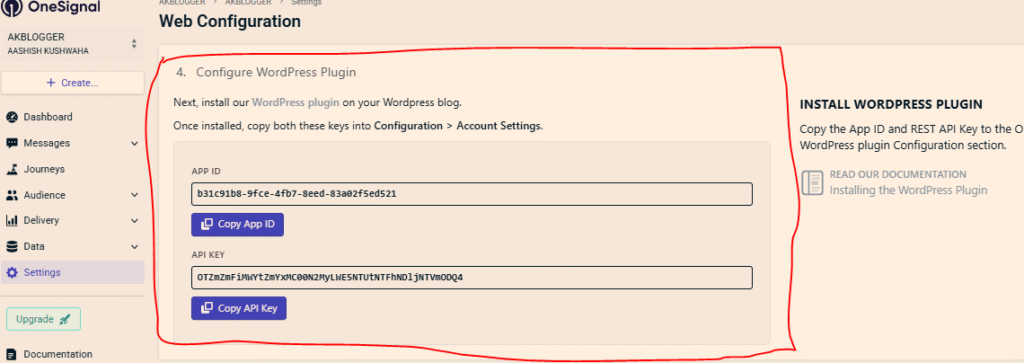
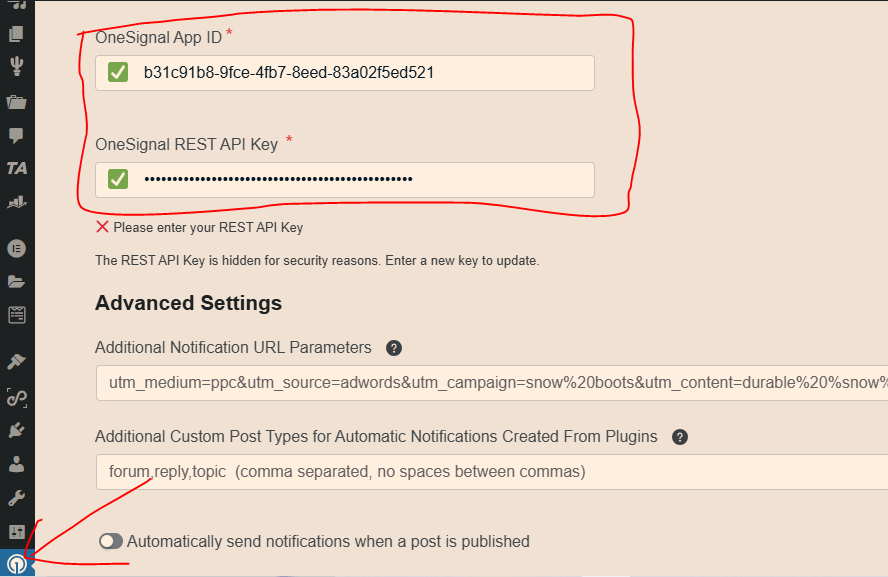
🔹 Step 4: App ID और API Key Setup
- OneSignal Dashboard से App ID और REST API Key copy करें
- WordPress Plugin settings में paste करें
🔹 Step 5: Testing Push Notification
- अब एक demo notification भेजें
- अगर notification subscriber तक पहुँचता है ✅ तो setup complete है।
OneSignal Push Notifications Pricing
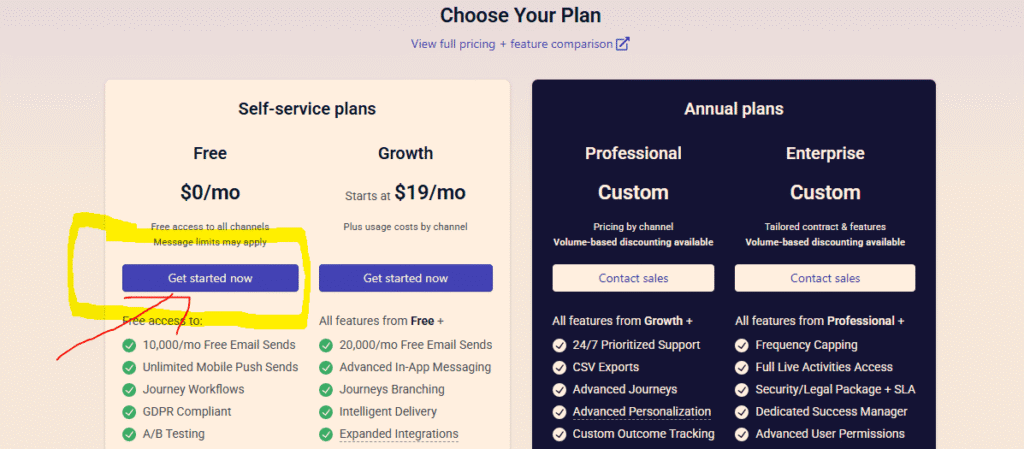
OneSignal free plan भी देता है और premium plans भी।
✅ Free Plan:
- 10,000 Subscribers तक
- Unlimited Push Notifications
- Basic Features
💰 Paid Plan (Starts at $9/month):
- Unlimited Subscribers
- Advanced Targeting
- A/B Testing
- Priority Support
👉 मतलब beginners के लिए Free Plan काफी है, लेकिन बड़ी websites / apps को Premium लेना चाहिए।
OneSignal के फायदे (Advantages of OneSignal)
OneSignal use करने के कई benefits हैं 👇
- Direct Traffic Boost:
जब भी आप नया blog publish करते हैं, push notification भेजकर instant visitors पा सकते हैं। - Better Engagement:
Readers directly आपके content तक पहुंचते हैं। - SEO Indirect Benefit:
High traffic और user engagement से indirectly ranking में मदद मिलती है। - Free Plan for Beginners:
10,000 Subscribers तक free service available है। - Easy WordPress Integration:
Plugin से आसानी से connect कर सकते हैं।
OneSignal के नुकसान (Disadvantages of OneSignal)
हर tool के फायदे और नुकसान होते हैं।
- Limited Free Features:
Advanced automation, A/B testing, segmentation केवल premium में available हैं। - Overuse Problem:
बार-बार notification भेजने से users irritate हो सकते हैं और unsubscribe कर सकते हैं। - Design Control Limited:
Notification का look & feel ज्यादा customize नहीं कर सकते।
OneSignal vs Other Push Notification Services
Market में और भी services हैं – जैसे PushEngage, VWO Engage, Firebase Cloud Messaging etc.
👉 लेकिन OneSignal beginners के लिए सबसे best option है क्योंकि:
- Free Plan बड़ा है
- Setup आसान है
- WordPress Plugin direct available है
Blogging, SEO और Digital Marketing में OneSignal का Role
आज के time में competition बहुत ज्यादा है। सिर्फ SEO और Social Media के भरोसे website grow करना मुश्किल है।
👉 यहाँ पर OneSignal काम आता है:
- आप loyal readers create कर सकते हैं
- Audience को instant update दे सकते हैं
- Affiliate Marketing और Digital Products का promotion कर सकते हैं
- Email Marketing की तरह audience build कर सकते हैं
FAQs – OneSignal Push Notification in Hindi
Q1. What is OneSignal Push Notification in Hindi?
Q2. What is OneSignal used for?
Q3. What is a Push Notification?
Q4. क्या OneSignal free है?
Q5. क्या OneSignal को WordPress में add कर सकते हैं?
Conclusion – What is OneSignal Push Notification in Hindi
दोस्तों, अब आपने detail में समझ लिया कि OneSignal kya hai, OneSignal Push Notification कैसे काम करता है और WordPress में इसे कैसे setup करें।
👉 अगर आप Blogging, Affiliate Marketing या Online Business करते हैं तो OneSignal आपके लिए बहुत useful है।
यह न सिर्फ traffic बढ़ाता है बल्कि आपको loyal readers और direct audience बनाने का मौका देता है।
💡 मेरी सलाह:
- Beginners free plan से शुरू करें
- धीरे-धीरे audience बढ़ने पर premium plan पर switch करें
- Regular लेकिन limited notifications भेजें
“मैं Aashish Singh, एक passionate content creator और digital entrepreneur हूँ। मुझे Blogging, SEO और Affiliate Marketing का real-time अनुभव है और मैं अपने ब्लॉग पर step-by-step tutorials, case studies और earning tips share करता हूँ। मेरा mission है कि हर beginner blogger online दुनिया में अपना career बना सके।”
Discover more from Akblogger
Subscribe to get the latest posts sent to your email.